Cannot set readonly property: level for class: org.gradle.internal.logging.services.DefaultLoggingManager
How to create a blog quickly using JBake and GitHub Pages
18 August 2021
Intro
This is so meta, but for my first post I wanted to write about the way I created this blog. You can find the repository of this blog here:
Prerequisites
-
Basic familiarity with Maven
-
A GitHub account
Some Initial Requirements
The main requirements for this project was a fast and easy way to:
-
write blog posts
-
generate a static site from the posts
-
publish the blog online
-
allow users to post comments
Subjectively, the easiest way to write technical documentation is Asciidoc(tor), so we decided that writing the blog posts in Asciidoc was a no-brainer.
I started looking at JBake for the static site generator. Especially if you are familiar with the whole Java ecosystem it makes sense to stick with it.
Publishing a site that resides in a GitHub repository through GitHub Pages is really straight-forward. There is not even any need for CI builds (if you don’t want to), whatever is inside the /docs folder of the repository is getting published!
Finally, for comments I found uterrances project (more on that later).
Uber Fails
| If you don’t want to read about the initial failures, you can skip directly to the solution that worked for me |
JBake "native"
The first roadblock we hit was when we tried to use JBake directly in a Windows laptop. It seems relevant to this issue:
Setting the destination folder of the JBake generated site was a hard requirement, since we needed it to be the /docs folder of the repository.
Gradle Plugin
Next attempt was the Gradle plugin for JBake. This is where we hit the second roadblock. There were several kinds of exceptions.
For example, when trying to run the bakePreview Gradle task I was getting the following exception:
Maven to the rescue!
The final and successful attempt was to use the JBake Maven plugin.
These are the steps that worked for me:
1. Create a new Maven project
For example in IntelliJ this can be done from the new project wizard.
2. Add the JBake Maven build configuration
Add in the pom.xml file the following build configuration:
 <build>
        <plugins>
            <plugin>
                <groupId>org.jbake</groupId>
                <artifactId>jbake-Maven-plugin</artifactId>
                <version>0.3.5</version> (1)
                <configuration>
                    <outputDirectory>./docs</outputDirectory> (2)
                </configuration>
                <executions>
                    <execution>
                        <id>default-generate</id>
                        <phase>generate-resources</phase>
                        <goals>
                            <goal>generate</goal>
                        </goals>
                    </execution>
                </executions>
                <dependencies>
                    <!-- include required dependencies here, see below -->
                    <dependency>
                        <groupId>org.asciidoctor</groupId> (3)
                        <artifactId>asciidoctorj</artifactId>
                        <version>2.4.3</version>
                    </dependency>
                    <dependency>
                        <groupId>org.freemarker</groupId> (4)
                        <artifactId>freemarker</artifactId>
                        <version>2.3.31</version>
                    </dependency>
                    <dependency>
                        <groupId>com.sparkjava</groupId> (5)
                        <artifactId>spark-core</artifactId>
                        <version>2.9.3</version>
                    </dependency>
                </dependencies>
            </plugin>
        </plugins>
</build>| 1 | Use the latest version of JBake Maven plugin. |
| 2 | The output folder must be the one that is published from GitHub Pages(/docs). |
| 3 | Add asciidoctor Maven dependency since we want to write the blog posts in asciidoc. |
| 4 | Add the templating engine of our choice (in this case using the default which is freemarker) |
| 5 | Add latest spark-core dependency to avoid an issue with the jbake:inline goal. More about this issue later. |
3. Generate initial site structure
The Maven plugin provides a goal that seeds the project/site with example content and templates. This is a good starting point. Run the following in a CLI window:
mvn jbake:seed
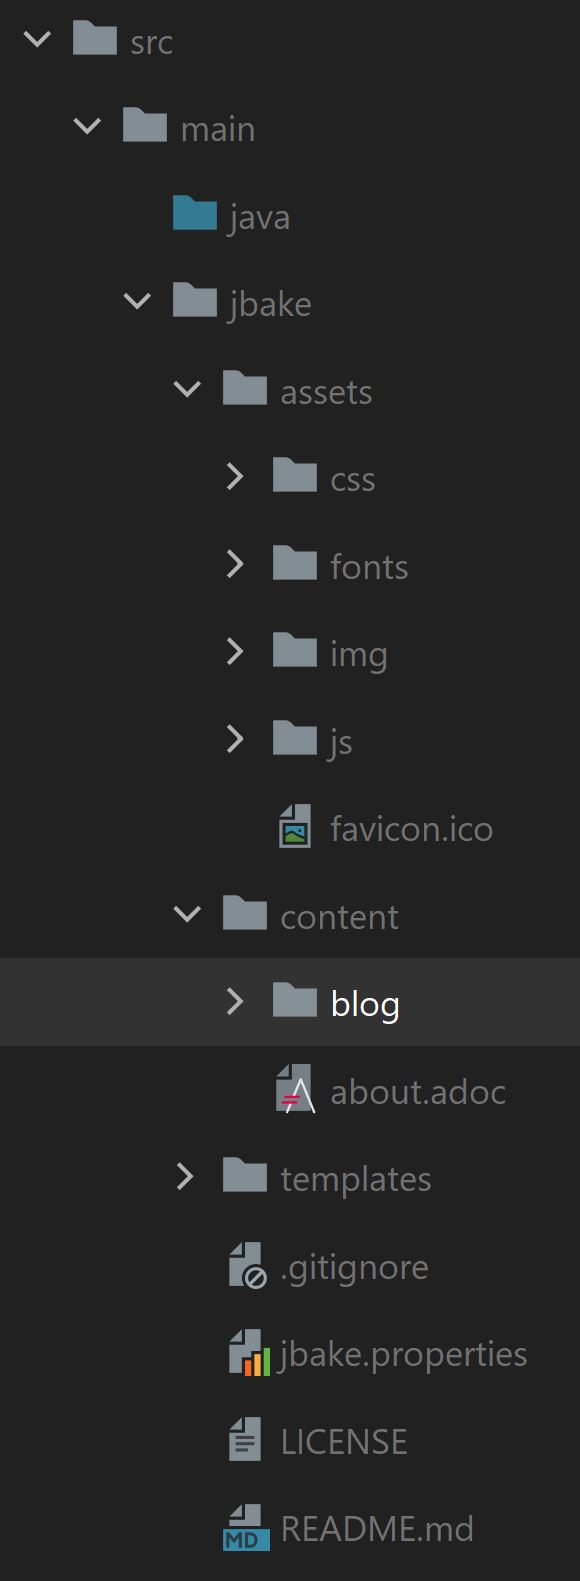
This will create an initial structure inside src/main/jbake folder where the site will be generated from. The structure looks similar to this (click image for actual size):
The blog posts and pages that we create will reside inside content/blog directory.
4. Serve site locally
The Maven plugin provides a goal to serve the site locally. This goal will watch for any changes and will also re-generate the site (in /docs folder). This way we can 1) see the changes in the browser immediately, 2) push the /docs folder in GitHub to publish the site automatically (more on that later).
Run the following command from a CLI window:
mvn jbake:inline
Check the output for a similar line:
[INFO] Started ServerConnector@47cdf91a{HTTP/1.1, (http/1.1)}{127.0.0.1:8820}
This means that in our local environment the site is accessible under the port 8802 and if we navigate to http://localhost:8820 we can see the sample blog content as generated by JBake.
5. Publish to GitHub Pages
We can of course delete all sample posts (maybe replacing the about page with our own). When we are ready to publish we need to link the local project with a GitHub repository.
In Intellij go to menu Git > GitHub > Share Project on GitHub. This implies that we have a GitHub account, and we have linked it with Intellij previously (out of scope for this article).
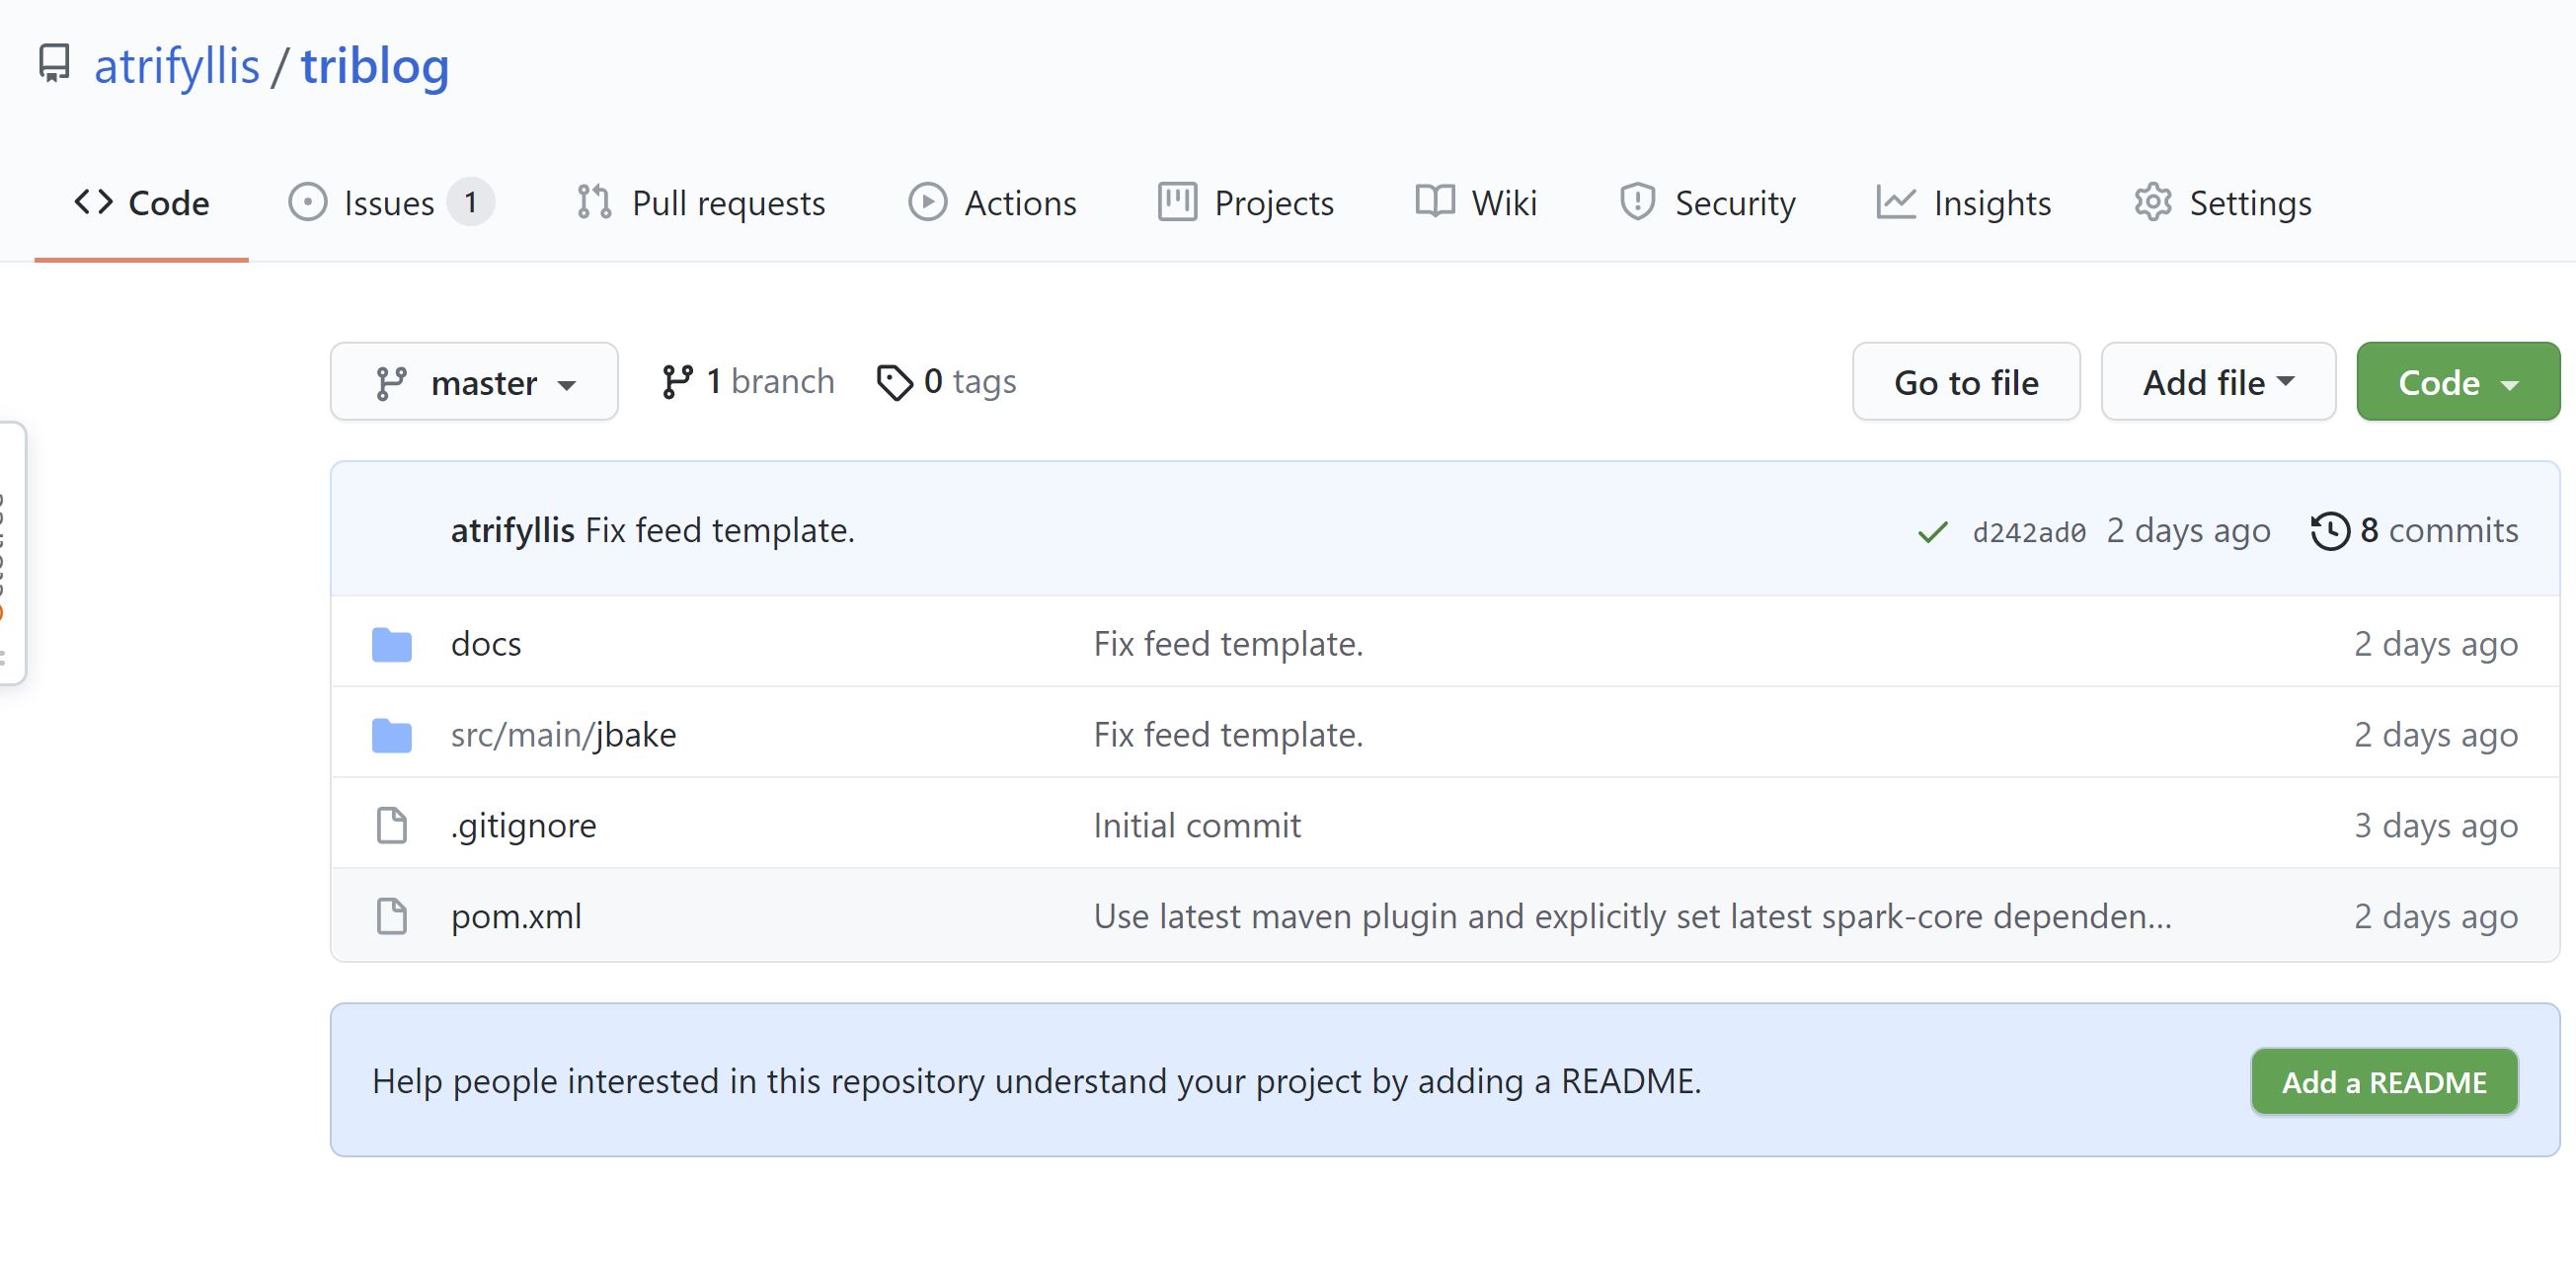
This how the GitHub repository should look like:

Now we navigate to GitHub repository Settings > Pages.
First, we have to make the repository public if is not already.
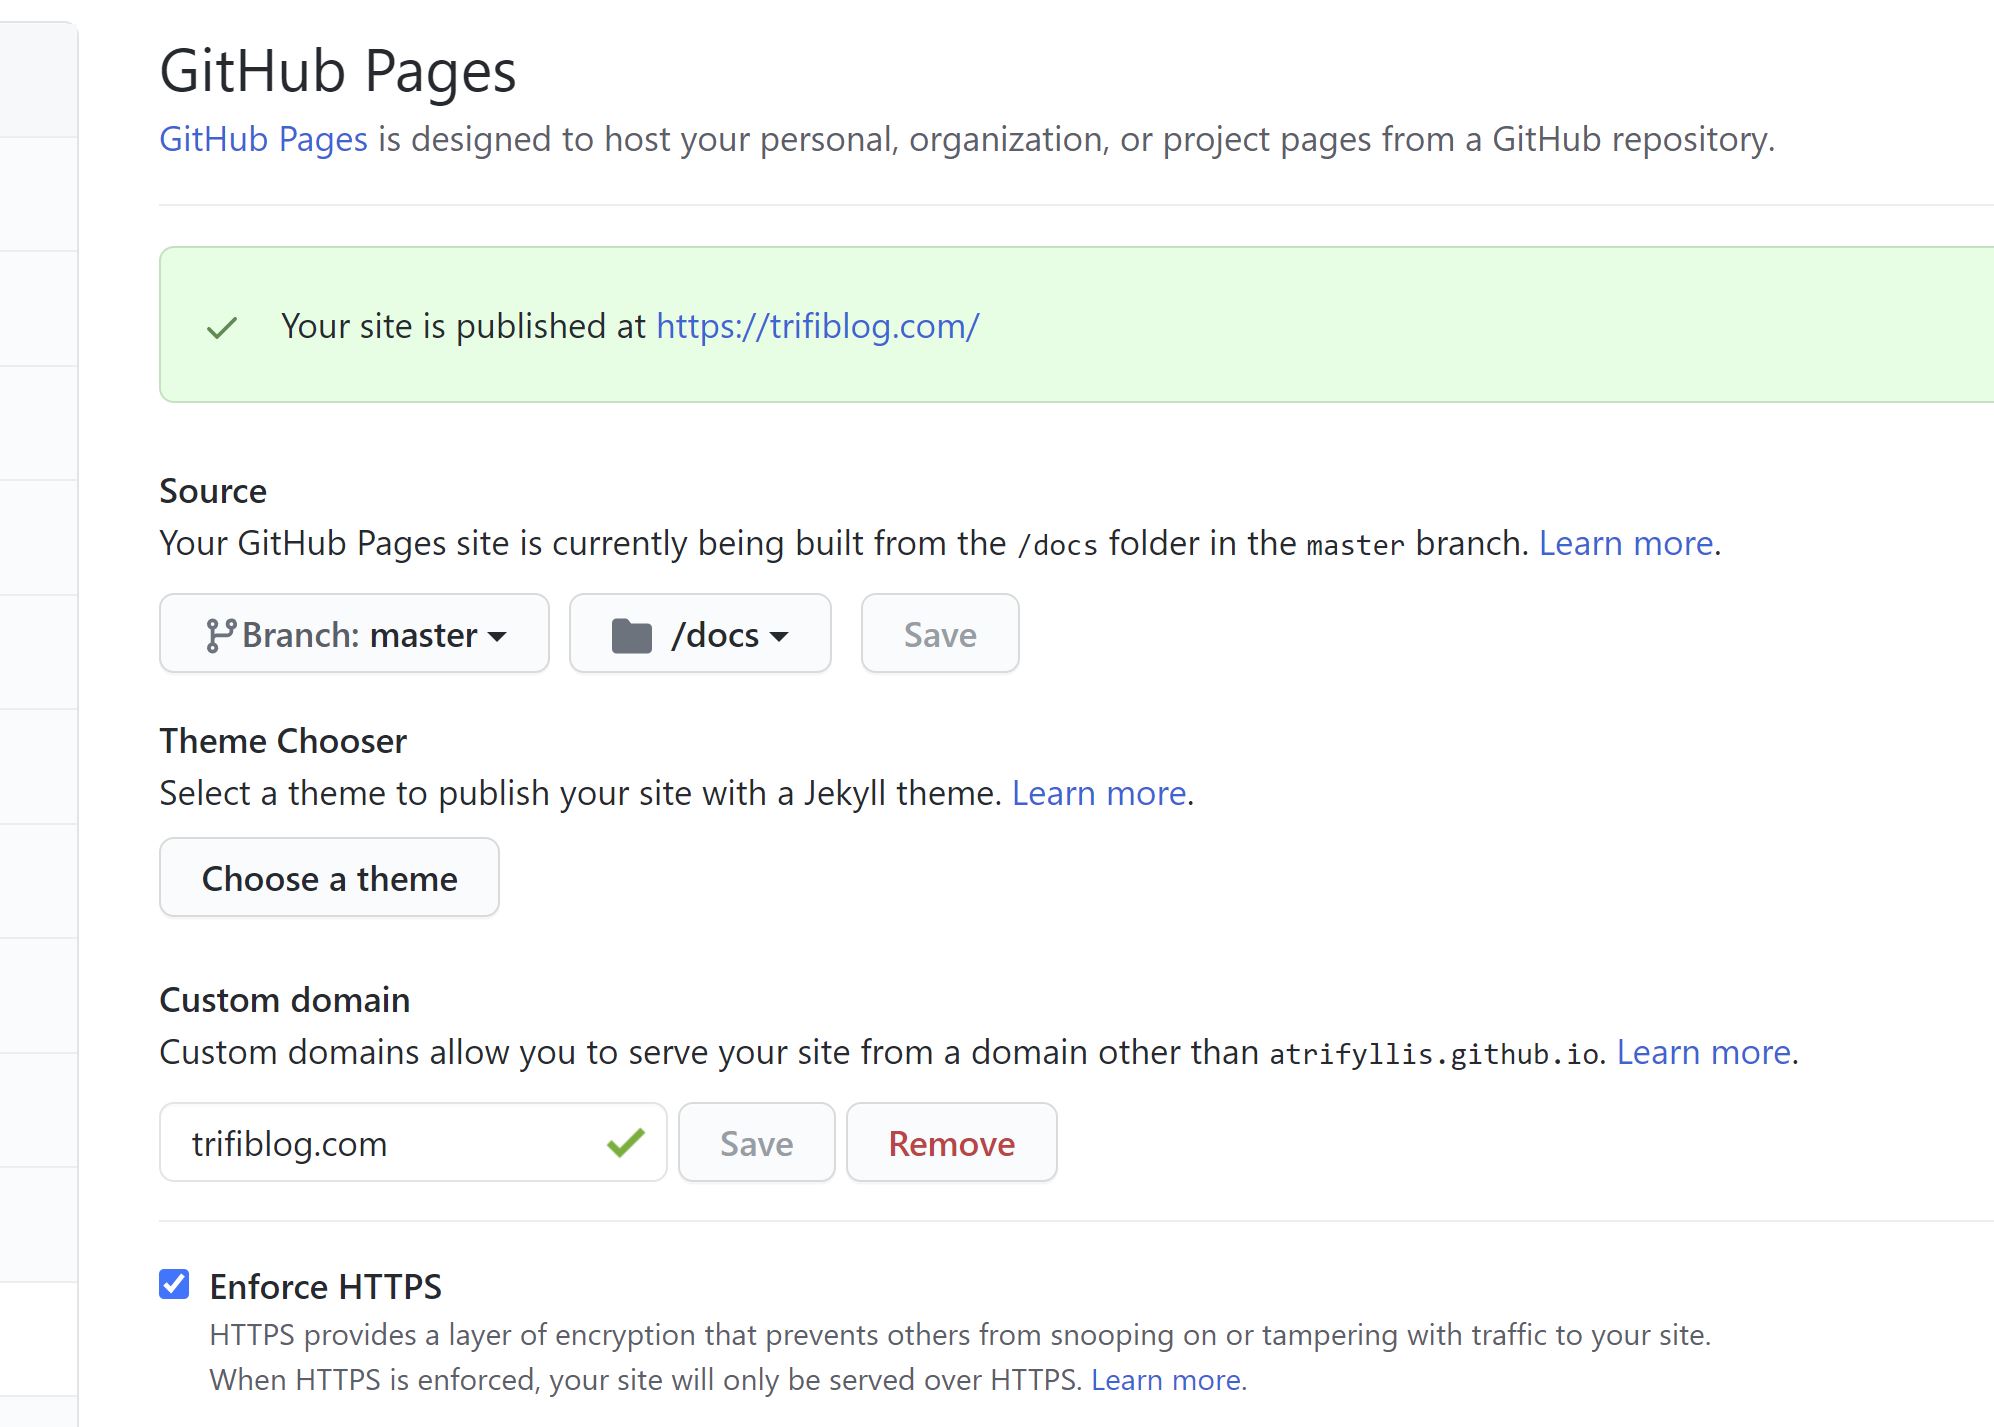
Next, we select in the Source section the master branch and the /docs folder.
For our repository this is how the Pages page looks like:

If we save these changes, after a small delay we are able to browse our blog under:
<username>.github.com/<repository_name>.
6. Allow users to comment on your posts
As mentioned before, we are going to use the utterances project.
What is great with it is that comments are stored as GitHub issues in the blog repository. So it is a great fit for our blog! It’s free, no ads and no tracking. What else can you ask?
The only downside is that to add a comment the user must have a GitHub account. But then again this is a dev-oriented blog, so we expect the majority of the readers to have such accounts.
We need to do the following to enable utterances comments:
-
Go to https://github.com/apps/utterances and click Configure, to install the application in GitHub.
-
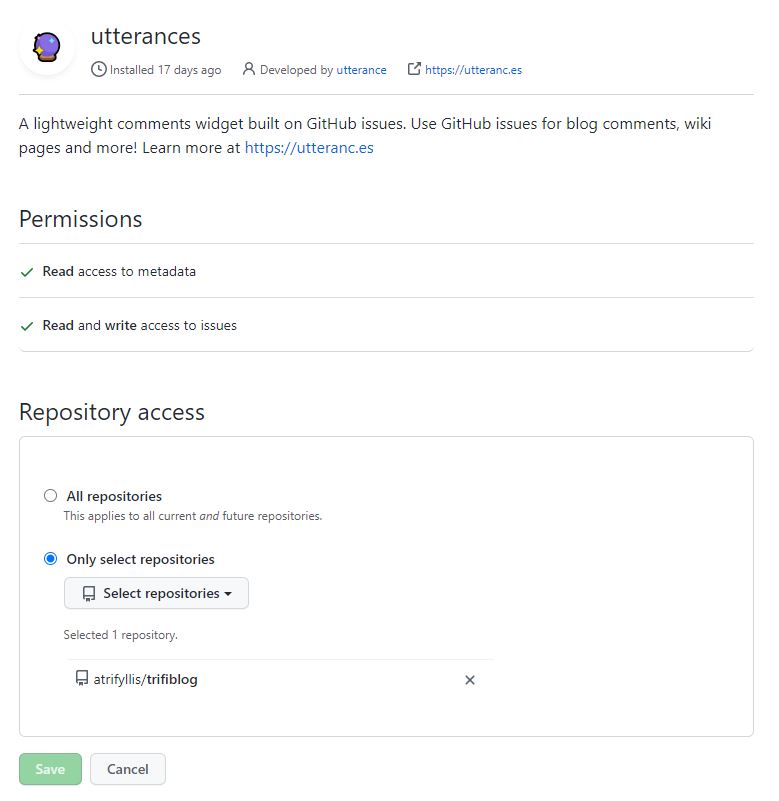
Select your blog repository only:

-
Go to post.ftl template and add the following template before the footer (don’t forget to change the repo attribute with your own repository path!!):
<script src="https://utteranc.es/client.js" repo="atrifyllis/trifiblog" issue-term="pathname" theme="github-light" crossorigin="anonymous" async> </script> -
Make sure that at the end of every post you can see a Comments section.
Extras
Custom domain
If we have a domain name or planning to buy one, there are some more steps involved to link the GitHub pages with our domain.
Most of the work involved has to be done in whatever domain provider we are using, so it is out of scope for this article.
Nevertheless, this is what was needed for this particular case:
-
Add the domain name in Pages settings without a subdomain (for example
trifiblog.comnotwww.trifiblog.com). This will create a new commit in our repository with a CNAME file with the following content:trifiblog.com
-
We navigate to the domain name provider web interface and try to find a way to change the DNS settings. In our case, we needed to add the following entries:

The first four highlighted entries are A records that point to the IP addresses for GitHub Pages.
The other highlighted entry is a CNAME record that points the www.trifiblog.com to the github username domain: <username>.github.com
For mor information about custom domains and GitHub pages please check the official GitHub documentation
JBake watch issue
The JBake Maven plugin provides a Maven goal jbake:inline for the first time, which bakes (= generates the site), watches and serves out content locally. WhenI tried running it for the first time, and tried changing a post to test the watch mode we got the following exception:
...
java.io.FileNotFoundException: C:\dev\WORSKPACE\JBAKE\triblog-Maven\docs\js\bootstrap.min.js (The requested operation cannot be performed on a file with a user-mapped section open)
at java.io.FileOutputStream.open0 (Native Method)
at java.io.FileOutputStream.open (
...
This reply on the JBake GitHub issues helped me understand that the issue was the outdated spark-core dependency, which depends on an older Jetty version. So adding an explicit dependency to the latest spark-core (seems to) have solved the problem.
